I hate overpriced things; I really do.
 Step one. Photo by Alec Damiano.
The past few times I’ve walked into craft stores, I’ve seen ingeniously crafted Halloween-themed floral centerpieces with glittered skulls, realistic ravens, black roses, rhinestone-studded spiders, blood red candles-- the list goes on. I fall in love for a few seconds, only to be heartbroken upon turning the price tag around.
... $70.
All for a bunch of fake flowers stuffed into a vase and some random props thrown on top?
 Step two. Photo by Alec Damiano.
Due to my dissatisfaction with the prices of these centerpieces, I decided to create my own-- entirely of supplies purchased from the local 99 cent store and some stuff I had lying around my house. The end result was surprisingly elegant and must have taken less than half an hour to complete.
Here’s what you’ll need (all of these Halloween-oriented, of course):
 Step three. Photo by Alec Damiano.
Vase Black flowers Skull Floral picks – we’re using pumpkins here Branch – can be natural or artifical. I’m using a glittery one with a bat on it. Spiked bracelet or black ribbon Gravel or rocks Halloween-themed bottle labels (optional)
Step one:Remove all the objects from their packaging. Fill the vase with the gravel. This will anchor down the flowers and other objects and prevent them from moving.
 Step four. Photo by Alec Damiano.
Step two: Put the flowers inside the vase. You may need to add some more gravel, depending on their height. Spread the flowers out and bend their stems to give the flowers different heights and add more volume to the bouquet. This isn’t an exact science. Just make the bouquet as poofy as you’d like it to be.
Step three:Add the branch. I put it in the middle of the bouquet, but it does not have to be this way. Experiment a little and see what looks best.
 Step five. Photo by Alec Damiano.
Step four: Place the picks inside the vase. You may need to bend the sticks to acheive your desired height. Move them around and see where they look best.
Step five: Rest the skull on top of the flowers. I got a skull that had a cord attached to it, and just hung the skull from the branch, like putting an ornament on a Christmas tree.
Step six:Put the spiked bracelet on the vase. If it doesn’t go all the way around, you can simply tape it from the back. If you don’t have a spiked bracelet, a black ribbon will work fine. Tie a bow on it, if you desire.
 Step six. Photo by Alec Damiano.
Step seven (optional): If you like the way it looks, put a bottle label on the vase. I personally didn’t like how it looked, so I put a spider on the side of the vase instead.
There you have it; I just saved you $50 and some heartache from the expenses. Treat yourself with a festive centerpiece while tricking everyone else on the price.
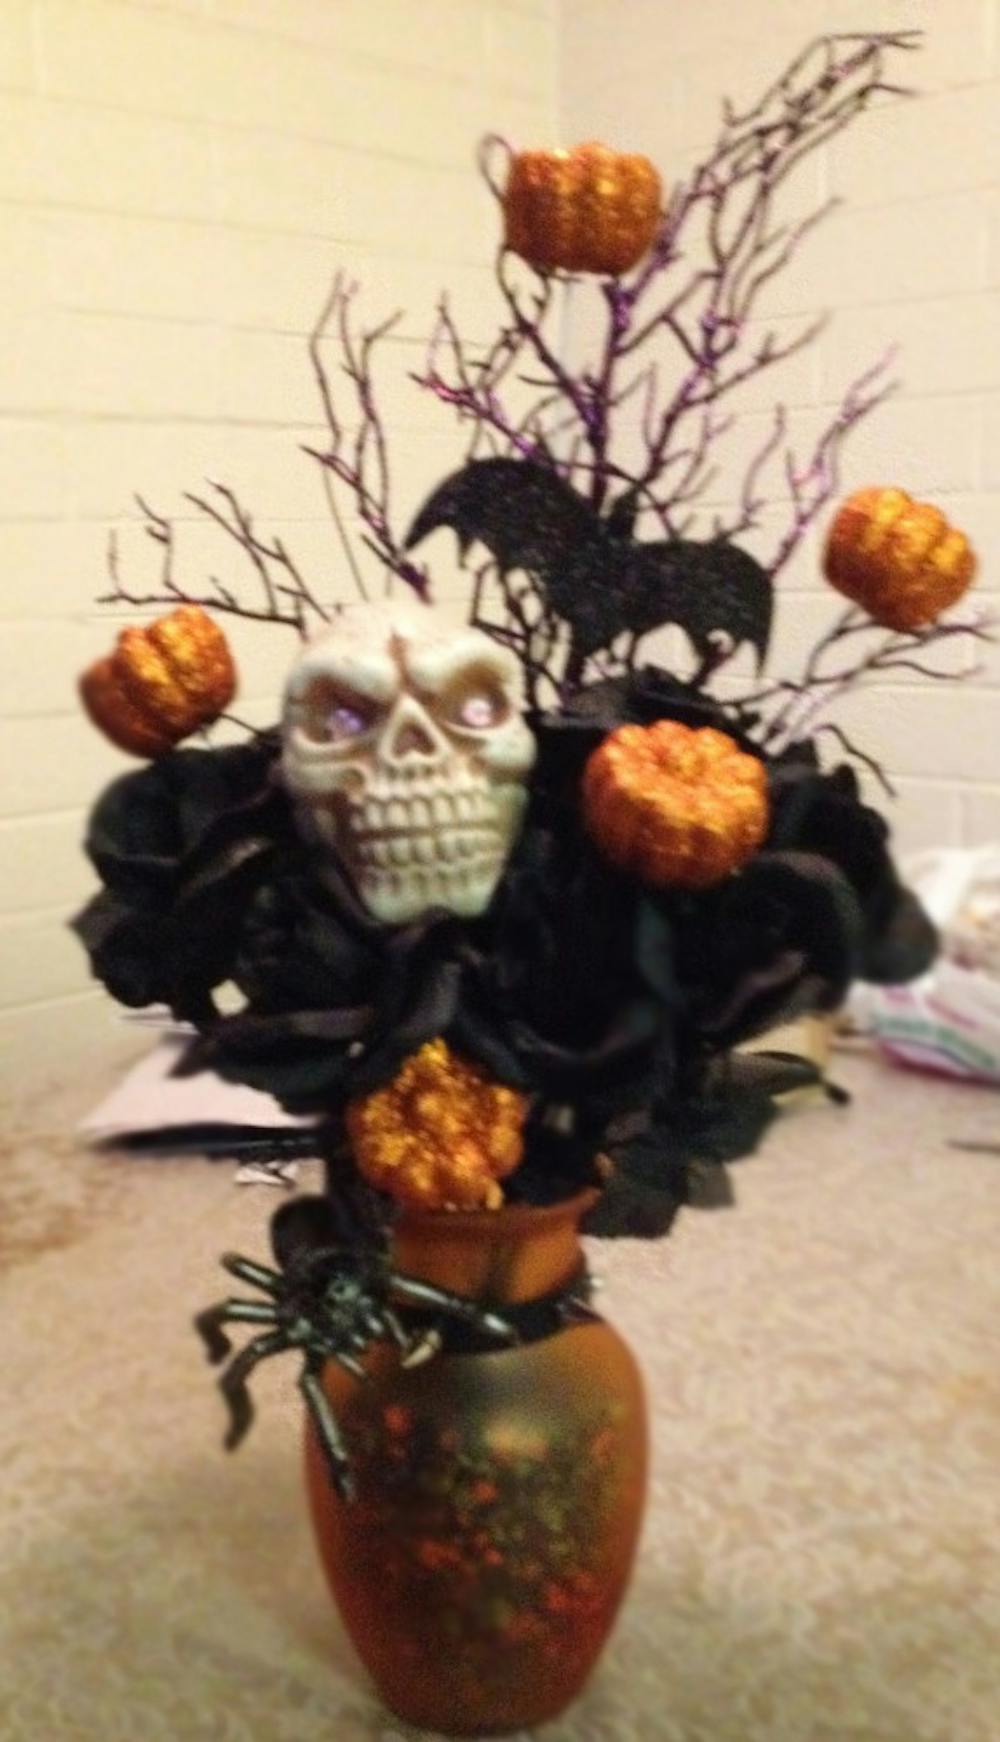
 The end of the project; not the end of your bank account. Photo by Alec Damiano.
Do you know of any interesting art, entertainment or crafts you’d like me to cover? Tweet me at @DamianoAlec or email me at Alec.Damiano@asu.edu. To see some of my artwork, click here.