Nail art seems to be all of the rage right now. We owe it all to WAH-Nails, a salon on the lower east side of London.
Starting in 2005 as a magazine about ladies that were contributing to the style and music of hip-hop, they were also dedicated to providing a space for a new wave of street smart feminism. The 2008 founder, Sharmadean Reid, decided to take the nail art she and her friends were supporting to the mainstream.On August 1st 2009 WAH nails opened up their London salon, not only a space for nail art but also held record launch parties, art shows, film nights, and a community for street smart feminists. They were named one of the "15 people who will definite the future of arts in Britain" and part of the "New Generation" in Vogue magazine.
There are many ways you can give yourself “WAH” nails without taking a trip to London. Here are some tools, tips, and tricks to get yourself started.
Here is what you'll need:
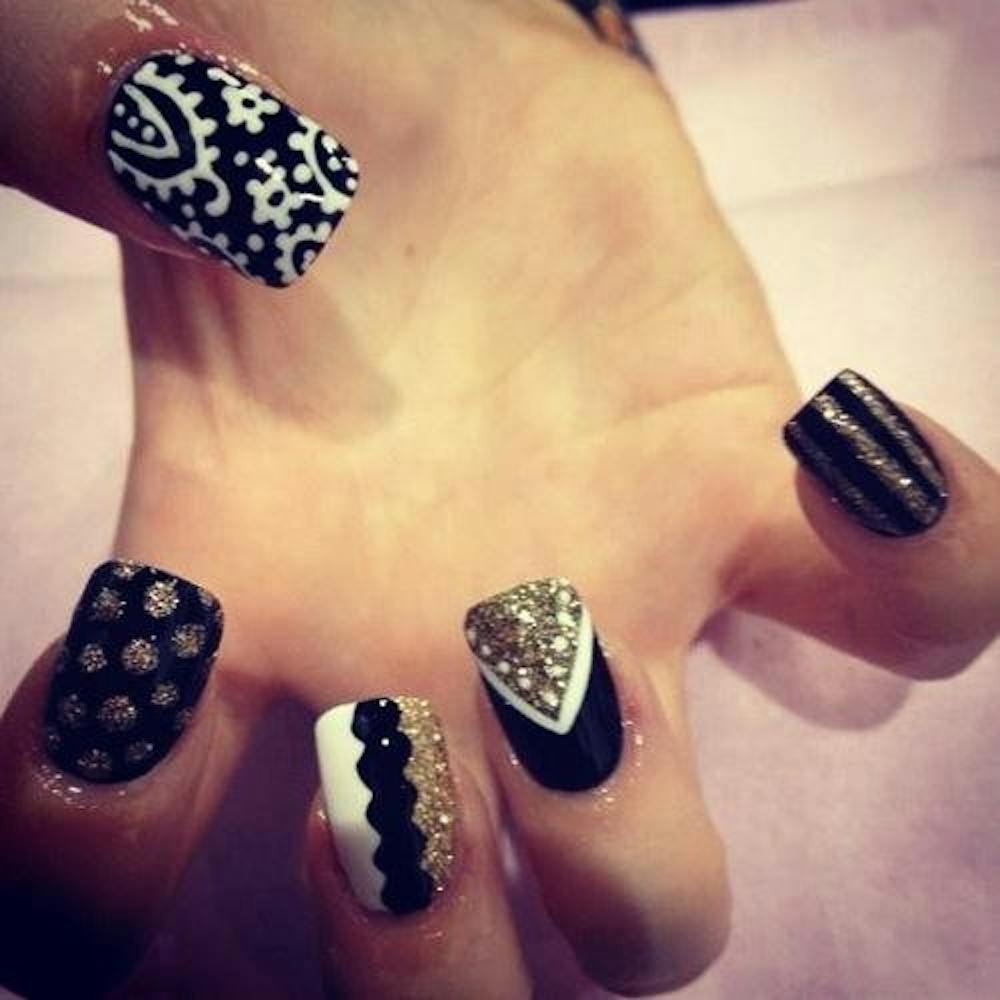
 Designs and patterns are essential to nail artwork. Photo courtesy of WAH.
-Nail Polish -Nail Polish remover -Cotton Balls -Tape -Pencil with an eraser -Pin/Needle/Small screw -Q-tip -Sponge
 Different designs you can do yourself. Photo courtesy of WAH.
 Some of the materials needed to glamorize your nails. Photo courtesy of WAH.
Trick # 1: Ombre effect Start by picking out two different colors of nail polish. Paint your nail half one color, and half the other. Take a Q-tip and gently rub it in the middle of where the two colors meet. Now take your sponge and lightly dab starting at the top moving down until the color begins to weaken. And there you have it- Ombre nails!
 Ombre nails. Photo courtesy of WAH.
Trick # 2: Tape to make perfect shapes and lines Use tape to block out certain parts of the nail to create a design neatly. You can also cut shape out of the tape to place on the nail and paint over for a cool effect. Just remember to wait for the nail polish to dry before removing the tape!
Trick # 3: Make your own nail art brush Grab your pencil and needle (you can also use a small screw or pin). Push the sharp end of your needle into the eraser until it is sturdy and stuck. Poor some nail polish out onto a plastic surface you can throw away. Use the end of the needle and dip into polish to create polka dots, patterns, and designs.
Trick #4: Get creative Look for patterns and inspiration on anything and everything.
Do you have ideas for what I should check out next? Email me at Gabrielle.M.Nelson@asu.edu