
Materials:
- Paper bags from your local grocery store
- Scissors
- Textbooks in need of protection
- Clear Duct tape (optional)
- Decorating supplies (optional; detailed below)
Go to your favorite supermarket and ask a friendly-looking cashier for paper bags. I went to Fry’s and a nice woman working there gave me five bags to use at no charge.
Step Two:
Once you have your bags, cut along the crease on any one of the four corners all the way until you reach the bottom. At this point, cut out the bottom of the bag, removing it entirely.
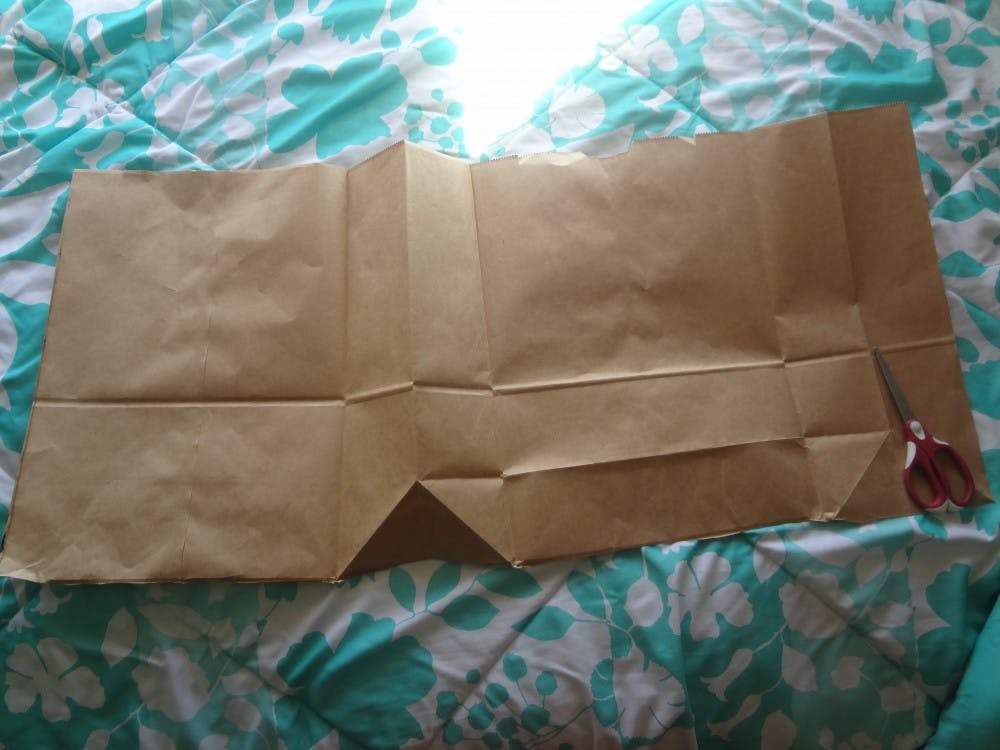
Step Three:
You should now have one long strip of paper as pictured above. If your bag has any logos on it, make sure they are facing up, towards you, unless you want the logos on your front cover. Place your book in the center of the paper.

Step Four:
Fold the bottom of the paper towards the bottom of your book and make a crease (pictured below). Repeat this step at the top of the bag.

Step Five:
Remove your book and fold the bag where you made the creases. Set the book back on top of the bag and make sure it covers the entire length of the book, top to bottom. You may need to make adjustments if it’s too big - just make your folds larger and larger until it fits the length of the book (pictured below).

Step Six:
Place your book in the middle of the paper. Fold the left side of the paper so that it touches the right side evenly, completely covering your book. Fold the excess paper on the top into the front cover of your book. Fold the excess paper on the bottom into the back cover of your book. If you have too much excess paper, simply cut it away - just make sure to leave a good inch or two to fold into the front and back covers.

Step Seven:
After all that folding, it’s time to decorate! I’ve included how I decorated my three textbooks below. After decorating, you can use clear duct tape to seal your cover for extra protection. Don’t forget to write the title on the spine of your book!

Decorating Tip One: The Modern Artist
You’ll need: Paint squares, glue and scissors. For this cover, I literally used leftover paint sample squares from my DIY Pixel Art Tutorial. If you don’t have any paint squares, simply go to Lowe’s or Home Depot and pick out some of your favorite colors. I only needed 24 for the front and back cover of my book. Cut out a square from your paint samples and make a pattern on your covers. Remove the cover from the book itself before you glue the squares on, just to be safe.

Decorating Tip Two: The Neat Freak
You’ll need: A writing utensil and sticky notes.This tip is by far the easiest of the three. Make your textbook into a calendar by dividing the front (and back if you like) into the days of the week you have class. For example, I have my Spanish class on Tuesdays and Thursdays. After every class, use colorful sticky notes to customize your cover and remind you to finish your homework or study for an upcoming exam. If you plan to tape this cover, I recommend that after you write your calendar sections on and tape it - that way you can add different sticky notes on top of it each week!

Decorating Tip Three: The Journalism Major
You’ll need: A newspaper, glue and a magazine (optional).Perfect for that freshman year copy of “Covering America,” this decorating tip takes advantage of the free copies of The New York Times available at Taylor Place and UCENT. If you don’t have any or can’t get up early enough to grab one, just ask around. My roommate had accumulated a week’s worth that she let me use. Cut out random columns of articles of all shapes and sizes and paste them to your cover (after removing the book). If you couldn’t tell I’m a NY Times fan, so I included their infamous logo on my copy as well. I also cut out the letters of my title from a magazine and pasted them on the spine instead of writing it on to add a little color.

Let me know if you guys have any questions! Have fun!
Contact me at adersch@asu.edu or @AlexDersch with questions, suggestions or comments. The more communication I get from you the better Eye Candy will be. Thank you!