
The blog Ruffled was originally started to be an inspiration for brides planning their weddings, looking for a vintage feel. It has expanded since to include many DIY home décor designs as well as DIY tutorials for wedding decorations.
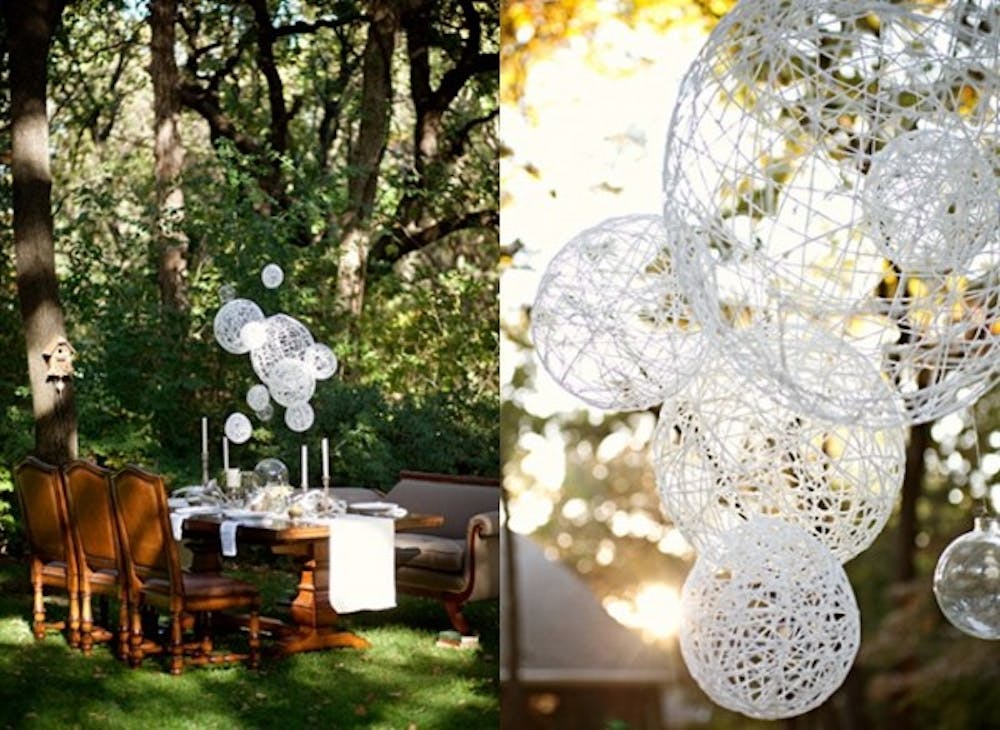
One of my favorite DIY tutorials that Ruffled posted was a tutorial describing how to make string chandeliers. In this blog, the intended purpose of these chandeliers was for a wedding decoration; however, I think this awesome craft would be perfect hanging in a bedroom, living room or above a kitchen table. This craft project is simple to make and can be created using many household items. For this craft project, you will need: yarn (a color of your choosing), glue, balloons, tray for glue, ½ cup of corn starch, Vaseline, clear spray paint, and ¼ cup of warm water.
To start, you will inflate your balloons to a medium size (think how big you will want your chandelier). Next, you will put Vaseline all over your balloons. This will prevent the string or yarn from sticking to the balloons once it’s covered in glue. Mix your glue, ¼ cup of warm water, and the ½ cup of corn starch to prepare a papier-mâché glue mixture. In order to create your chandelier, you will coat your yarn in the glue mixture and then wrap the string all around the balloon. When you’re done, at this point your chandelier will look like a balloon covered in a web of sorts. Let this dry for about 24 hours. Once dry, pop the balloon.
Then, spray your chandelier with a clear spray paint to have the string stay in place and not fall apart.
And now your chandelier is ready for hanging! Where will you hang yours?


